Educational Live Support: Mastering Calendar Bookings, Video Optimization & Marketing Funnels
 David Zenler
Master recurring bookings, video compression, marketing funnels & course management with expert guidance from Zenler's Educational Live Support Desk.
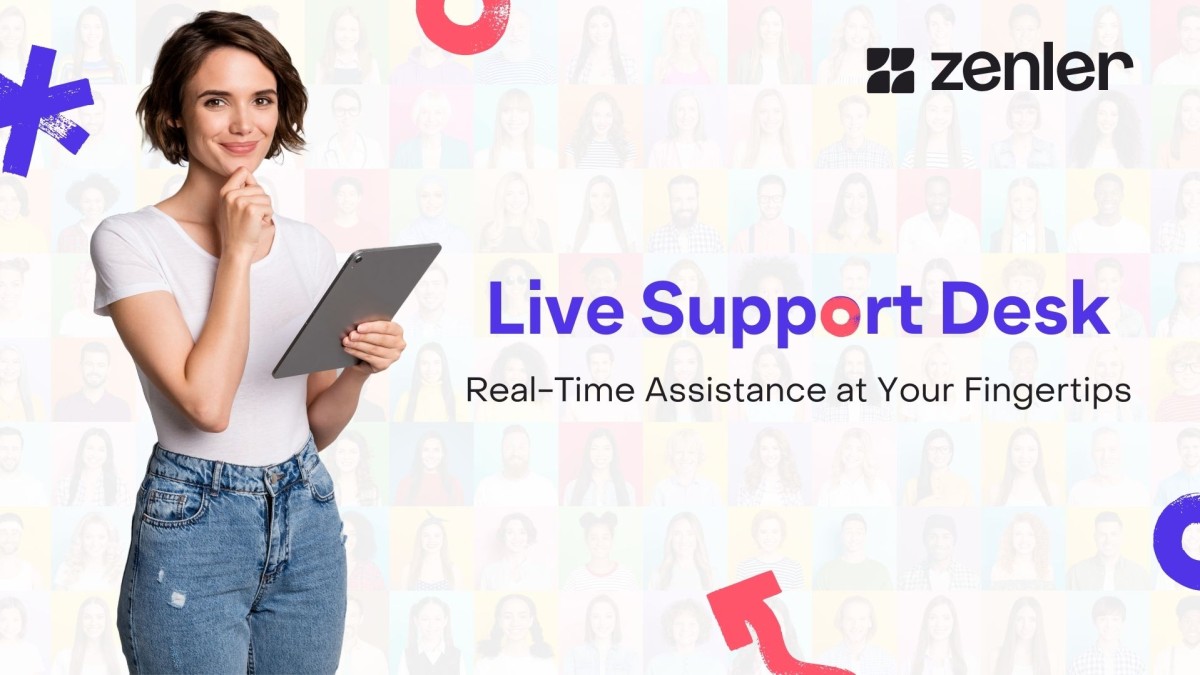
About Zenler's Educational Live Support Desk
Zenler hosts weekly Educational Live Support Desk sessions via Zoom where course creators receive real-time assistance from platform experts. These interactive sessions provide direct access to solutions for technical challenges, marketing strategies, and platform optimization. All sessions are recorded and made available on Zenler's YouTube channel with convenient chapter markers for easy navigation.
📅 Want to attend a future session? Subscribe to Educational Live Support Desk and stay updated on upcoming live support sessions
📺 Watch replays on Zenler YouTube playlist
✉️ Zenler Technical Support Email: support@zenler.com
The latest Zenler Educational Live Support Desk session delivered practical solutions to common challenges faced by course creators. From setting up complex booking systems to optimizing video content and creating sophisticated marketing funnels, this session covered essential techniques for building successful online course platforms.
Setting Up Recurring One-to-One Calendar Bookings
One of the most complex questions addressed involved setting up recurring one-to-one meetings for course participants. This is particularly valuable for coaches and consultants who need scheduled consultation calls as part of their course offerings.
The Challenge
Course creators often need to offer personalized consultation sessions at multiple times throughout the week, allowing students to select convenient time slots. The challenge is creating a system that:
- Displays available time slots across multiple days and weeks
- Prevents double-booking
- Automatically registers participants
- Sends confirmation and reminder emails
The Solution
While Zenler's calendar system differs from dedicated booking platforms like Calendly, you can create an effective booking system using recurring live events combined with a custom landing page:
Step 1: Set Up Recurring Live Events
- Create your one-to-one session as a live event
- Set participant limit to 1 to prevent double-booking
- Configure recurring occurrences for your available time slots
- Enable the "apply to all occurrences" toggle for automations
Step 2: Create a Landing Page
- Design a landing page displaying all available time slots
- Add buttons for each time slot
- Link each button to the specific live event registration
Step 3: Configure Automations
- Set up email confirmations for registered participants
- Enable the critical "on all occurrences" toggle switch
- Create reminder emails for upcoming sessions
Important Note on Calendly Integration
For course creators who prefer Calendly's self-service booking functionality, Zenler can integrate with Calendly using Zapier. However, this requires additional automation setup to enroll participants into your Zenler courses after booking.
Video Compression: Optimizing Course Content
Video file size management is crucial for course performance. Large video files slow down page loading, consume excessive bandwidth, and create poor user experiences.
The Compression Misconception
Many course creators believe they need separate compression software like Handbrake. However, if you're using any video editing software—including Camtasia, After Effects, Final Cut Pro, or even mobile apps—compression options are already built in.
For Desktop Video Editors
Best Practice: Configure compression settings during export, not as a separate step.
When exporting from editing software:
- Select MP4 as your output format (avoid AVI or MOV files)
- Adjust quality settings to balance file size and visual quality
- Consider your target resolution (1080p is usually sufficient)
- Use H.264 codec for maximum compatibility
For iPhone Users Recording Direct Video
If you're recording course videos directly on your phone without editing:
Check Your Recording Settings:
- Navigate to iPhone Settings → Camera
- Adjust video recording resolution (4K creates massive files)
- Consider recording at 1080p at 30fps for most course content
- Use apps like CapCut (available on mobile and desktop) for basic editing and compression
File Size Targets
A properly optimized video should achieve:
- 10-15 minutes of content: 50-150 MB
- 30-minute lesson: 150-300 MB
- Hour-long session: 300-600 MB
Compare this to uncompressed files that can reach 1-5 GB for the same content—a dramatic difference in performance.
Creating Lead-Capture Marketing Funnels
Marketing funnels are powerful tools for capturing leads, validating email addresses, and nurturing potential students. This session demonstrated how to create a sophisticated funnel for delivering video content while building your email list.
The Three-Step Funnel Strategy
Step 1: Opt-In Page
- Create a lead magnet funnel (not video series funnel)
- Design an attractive opt-in form
- Add compelling copy about your free content
- Configure post-submit action to go to thank you page
- Add tags to segment leads by source (summit, social media, etc.)
Step 2: Thank You Page
- Direct users to check their inbox
- Explain they'll receive a link via email
- Add a short video encouraging them to watch for the email
- Do NOT place the actual content here
Step 3: Hidden Video Delivery Page
- Clone the thank you page to create a third step
- This page has no navigation links to it
- Upload your video content here
- Add calls-to-action for your paid courses
- Include testimonials or additional value propositions
Why This Structure Works
Email Validation: By requiring users to click a link in their email to access content, you verify they provided a legitimate email address. Users who enter fake emails (test@test.com) won't access your content, protecting you from invalid leads.
Automated Nurturing: The email automation can include:
- Immediate access link to the video
- Follow-up emails with additional value
- Progressive offers leading to paid courses
- Personalization using first name and other variables
Flexible Sequencing: You can extend this funnel indefinitely:
- Add multiple video steps
- Create a multi-day or multi-week sequence
- Branch paths based on user behavior
- Include surveys for deeper segmentation
Setting Up Email Automation
Within your funnel's automation section:
- Create a welcome email triggered by opt-in
- Personalize with variables like {{first_name}}
- Add a clear call-to-action button linking to your hidden video page
- Style the email professionally using the built-in editor
- Set the automation to "live" status
Critical Step: Always test your funnel by opting in yourself to verify the complete user experience.
Managing Course Curriculum
Organizing course content effectively impacts student experience and completion rates. This session addressed common curriculum management challenges.
Reordering Lessons and Sections
Zenler's drag-and-drop interface makes reorganization simple:
Moving Lessons Between Sections:
- Click and hold the corner handle of any lesson
- Drag to a new position within or between sections
- Release to drop in the new location
Reordering Sections:
- Sections can be dragged to change their sequence
- Lessons automatically move with their parent section
Splitting Combined Lessons
If you've accidentally combined two lessons into one text block:
Method 1: Copy and Paste
- Create a new lesson of the same type
- Open the combined lesson and select all content for the second topic
- Copy the content
- Delete it from the original lesson
- Paste into the new lesson
- Adjust positioning as needed
Method 2: Copy Lesson Feature
- Use the "Copy Lesson" option in the lesson menu
- Select the destination course or section
- Edit both copies to split the content appropriately
Customizing the Student Dashboard
The new Zenler student dashboard provides a modern, engaging interface showing course progress, achievements, and available courses.
Current Customization Options
The dashboard is currently not customizable by design. This intentional limitation prevents users from accidentally breaking dynamic functionality like:
- Real-time progress tracking
- Leaderboard updates
- Achievement displays
- Course enrollment status
When the Dashboard Appears
The enhanced dashboard activates only when gamification is enabled for your site. This ensures the leaderboards, points, and achievement features function correctly.
Future Customization
The Zenler development team is working on:
- Toggle options to enable/disable specific dashboard elements
- Custom block support for membership sites
- Greater control while maintaining core functionality
- Integration with the upcoming advanced page builder
For membership sites requiring complete control over the student landing page, you may prefer to keep gamification disabled and design a custom landing page using Zenler's page builder.
Working with Top Navigation Menus
Menu management is essential for creating intuitive site navigation. Understanding how to edit, reorder, and optimize your menu improves user experience.
Accessing Menu Settings
Since most users employ the dynamic header menu:
- Navigate to any page on your site
- Click "Edit" to enter the page editor
- Click the header menu (it highlights in a gold/mustard color)
- Click the settings wheel icon in the corner
Menu Management Techniques
Reordering Menu Items:
- Drag items to new positions along the top menu
- Drag items within dropdown menus to reorder
- Changes apply instantly across all pages
Adding to Dropdown Menus:
- Click the parent menu item
- Select "Submenu"
- Add your new item with its link
- Click save to apply
Removing Menu Items:
- There's no hide/show toggle for individual items
- Delete items you don't want displayed
- You can easily re-add them later by creating a new menu item with the same link
Menu Optimization Tips
Keep It Simple: Limit top-level menu items to 5-6 maximum. More items cause the login/signup buttons to drop to a second line, creating an unprofessional appearance.
Use Dropdowns Strategically: Group related content under dropdown menus to keep your main navigation clean and organized.
Moving Items Between Levels: You cannot drag items from a dropdown to the top level. Instead:
- Open the menu item and copy its link
- Delete the item from the dropdown
- Create a new top-level menu item
- Paste the link
- Update the label
Copying Quizzes Across Multiple Courses
When you improve a quiz in one course, you'll want to implement those improvements across all your courses without manually recreating them.
The Copy Lesson Feature
Zenler's "Copy Lesson" function works for all lesson types, including quizzes:
- Navigate to the course containing your improved quiz
- Click the three-dot menu next to the quiz lesson
- Select "Copy Lesson"
- Choose the destination course from the dropdown
- Select the specific section if applicable
- Click copy
Important Consideration: When copying quizzes, test whether updates to the original quiz automatically sync to copied versions, or whether they function as independent clones. This affects your workflow when making future improvements.
Understanding Video Series vs. Lead Magnet Funnels
Zenler offers different funnel types for different purposes. Understanding when to use each maximizes their effectiveness.
Video Series Funnels
Limitations:
- Maximum of 10 video steps
- Template-based design with locked video icons
- Cannot add additional steps beyond 10
Best Use Cases:
- Short video courses (10 lessons or fewer)
- Product demonstrations
- Mini-courses or challenges
Lead Magnet Funnels
Advantages:
- Unlimited steps (you can add 30, 50, or even more)
- Flexible design options
- Can include videos, text, downloads, surveys
- Cross-linking between funnel steps
- Better for complex sequences
Best Use Cases:
- Extended video series (30+ days)
- Email sequences with multiple touchpoints
- Progressive offers and upsells
- Treatment follow-up sequences
- Any funnel requiring more than 10 steps
Pro Tip: For a 30-day video reminder sequence, always use lead magnet funnels. Add each day as a separate step, then create email automations to send users to each step on schedule.
Service-Based Businesses vs. Course Structure
Course creators offering services rather than traditional courses face unique challenges around pricing, bundling, and checkout processes.
Current Checkout Limitations
Zenler currently processes payments individually per course/service. There's no shopping cart allowing customers to select multiple items and check out once.
Workarounds for Service Providers
Option 1: Pricing Tiers
Structure a single "course" containing all your services as separate sections:
- Section 1: Service A
- Section 2: Service B
- Section 3: Service C
Create pricing tiers:
- Tier 1 ($100): Access to Service A only
- Tier 2 ($200): Access to Services A + B
- Tier 3 ($300): Access to all services
Option 2: Course Bundles
Set up each service as an individual course, then create bundles:
- Service A + B Bundle ($180 - save $20)
- Service B + C Bundle ($190 - save $10)
- Complete Package ($250 - save $50)
Option 3: Automated Coupon Strategy
When someone purchases any service:
- They complete checkout individually
- An automated email sends immediately
- The email includes a coupon code for 20% off other services
- The coupon link takes them directly to the checkout page
- The discount auto-applies when they click through
This approach encourages additional purchases while maintaining automated workflow.
WordPress to Zenler Migration Strategy
Many established course creators worry about migrating from WordPress to Zenler, particularly concerning SEO and traffic loss.
The Subdomain Approach
Do Not Abandon Your WordPress Site if it has:
- Established traffic (100+ visitors per day)
- High search engine rankings
- Indexed pages driving organic traffic
- Several years of content and authority
Recommended Setup
Keep WordPress for:
- Your primary domain (yourname.com)
- Blog content
- Lead generation pages
- Content marketing
Use Zenler for:
- Course delivery (courses.yourname.com)
- Student management
- Community features
- Membership content
Setting Up a Subdomain
- Access your domain provider (GoDaddy, NameCheap, etc.)
- Navigate to DNS management
- Add a CNAME record pointing to your Zenler site
- Wait 12-48 hours for DNS propagation
- Verify the connection in Zenler's custom domain settings
Complete Documentation Available:
Zenler provides step-by-step guides for major hosting providers:
- GoDaddy subdomain setup
- NameCheap configuration
- cPanel instructions
- Hostinger setup
- Site Ground integration
Visit support.newzenler.com and search for "subdomain" to access these guides, including video tutorials with screenshots.
The Analogy
Think of your domain as a house (WordPress site) with a garage (Zenler subdomain). They're separate structures but part of the same property. You can have multiple "garages" (subdomains) around your main house (root domain)—each serving a specific purpose while maintaining connection to your primary brand.
Automation Integration with Zapier
Advanced course creators often need to connect Zenler with external systems for sophisticated workflows.
Zapier Integration Capabilities
Zenler integrates natively with Zapier, enabling connections to thousands of apps:
Common Use Cases:
- Enroll users from external payment systems
- Add students to CRM platforms
- Trigger email sequences in third-party tools
- Update spreadsheets with enrollment data
- Connect with project management tools
API Access
For developers or advanced users, Zenler's API provides additional control:
- Custom enrollment workflows
- Automated user management
- Data synchronization
- Webhook triggers for real-time updates
Alternative: Pabbly Connect offers similar functionality to Zapier and can access Zenler's API for automation purposes.
Recurring Webinar Automation Settings
A common mistake causes automation emails to fail after the first occurrence of a recurring webinar.
The Critical Toggle Switch
When setting up recurring webinars:
- Create your live event with multiple occurrences
- Navigate to the automation settings
- Locate the "Apply to All Occurrences" toggle
- Enable this toggle
If this toggle remains disabled, automation emails only send for the first occurrence. Subsequent sessions won't trigger any emails, leaving participants without confirmation or reminder messages.
Verifying Your Settings
Access: Live Interactive Webinars → Select Your Event → Settings → Automations
Check that the recurring toggle is enabled before launching your webinar series.
Support Documentation: Search "recurring" at support.newzenler.com for detailed guides including screenshots showing exactly where this toggle appears.
Branching Logic Surveys
One of Zenler's most underutilized features, branching surveys enable sophisticated lead segmentation and personalization.
How Branching Surveys Work
Based on answers participants provide, the system:
- Sends targeted email sequences
- Routes users to specific course offerings
- Tags leads with relevant attributes
- Creates personalized learning paths
Example Use Case
Dog Training Course Selection:
Question 1: "What best describes your dog?"
- Puppy (under 1 year)
- Adult dog (1-7 years)
- Senior dog (7+ years)
Question 2: "What's your primary training goal?"
- Basic obedience
- Behavioral issues
- Advanced tricks
Based on responses, the survey automatically:
- Sends emails about age-appropriate courses
- Tags the lead (e.g., "puppy-owner-obedience")
- Directs them to the most relevant course offering
- Adjusts email sequences accordingly
Creating Branching Surveys
Watch Zenler's comprehensive tutorial on branching surveys by searching "Zenler branching surveys" on YouTube. The feature appears complex initially but becomes intuitive once you understand the logic flow.
Key Takeaways from This Session
Success with Zenler requires understanding both technical features and strategic implementation:
Technical Mastery
- Optimize all video content before uploading to prevent performance issues
- Use lead magnet funnels instead of video series funnels for unlimited steps
- Enable "all occurrences" toggle for recurring event automations
- Validate email addresses by requiring inbox clicks to access content
- Set up subdomains rather than abandoning established WordPress sites
Strategic Implementation
- Invest 95% of your time in marketing, not endless course refinement
- Build sophisticated funnels to automate lead nurturing
- Use course bundles and pricing tiers to offer flexible purchase options
- Leverage branching surveys for personalized student experiences
- Keep navigation simple with 5-6 top menu items maximum
Support Resources
Never struggle alone—Zenler provides extensive support:
- Educational Live Support Desk: Weekly sessions with live Q&A
- The Complete Guide to Zenler: Comprehensive video training
- Support Documentation: Searchable guides at support.newzenler.com
- Direct Email Support: support@zenler.com
- Facebook Community: Active group of fellow course creators
Join the Next Live Support Session
Don't miss future Educational Live Support Desk sessions! These interactive meetings provide direct access to Zenler experts who solve your specific challenges in real-time.
Every Session Covers
- Live demonstrations of platform features
- Real-time problem solving
- Marketing and growth strategies
- Technical troubleshooting
- Best practices from successful course creators
All sessions are recorded with chapter markers, allowing you to jump directly to topics relevant to your needs.
Additional Resources
- Zenler Tutorial Site: tutorials.newzenler.com
- Marketing Basics with Zenler Course: Available in the Training Library
- Survey Funnels and Branching: Complete Workshop 3 Hours on YouTube
Conclusion
The Educational Live Support Desk demonstrates Zenler's commitment to course creator success. Whether you're troubleshooting technical challenges, optimizing your marketing funnels, or scaling your online education business, these weekly sessions provide practical solutions from platform experts.
Remember: Your course content is valuable, but success depends on effective delivery, smart marketing, and optimized technical performance. Use these tools and strategies to create a professional, efficient learning platform that serves your students and grows your business.
The platform is your foundation—your marketing and student experience determine your success.
Categories: : Live Support Desk
Copyright © 2026 Zenler. All rights reserved.
Terms | Privacy Policy | Cookie Policy | Support