Course Equipment Guide for Recording Online Lessons
 David Zenler
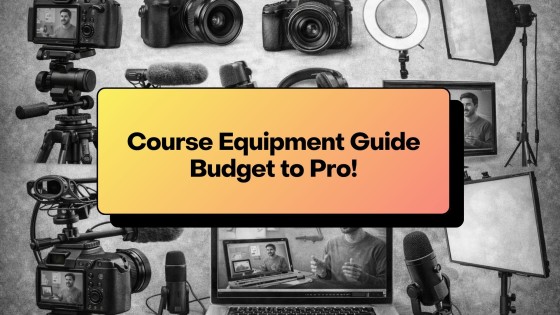
Learn the essential equipment for recording online course lessons, including cameras, microphones, lighting, screen tools, and budget setup tips.
You don't need expensive studio gear to record a high-quality online course. In fact, most creators record their whole course with just a phone, a lapel mic, and good lighting.
Quick answer: what equipment do you need to record an online course?
Most course creators can start with a smartphone or webcam, a clear microphone, stable lighting, and a quiet recording space. Audio matters more than camera quality, so a simple lapel or USB microphone is usually the best first upgrade.
Once the lessons are recorded, New Zenler can host the course, organise lessons, add downloads, publish the sales page, and connect the course to funnels, email, communities, and live sessions.
This guide breaks down exactly what you need (and what you don't), so you can get started without wasting money.
Best Course Recording Equipment — Beginner to Pro Setup
Section 1: Your Camera Options
1. Smartphone Camera (Perfect for 90% of creators)
- Shoot in 1080p or 4K
- Excellent for talking-head videos
- Works with clip-on or wireless lapel mics
Best for: Beginners, budget setups, quick recording.
2. Webcam (Simple + Good Quality) Useful for:
- Live sessions
- Talking head + screen share
- Desk-based teaching
3. Mirrorless/DSLR (Upgrade Option) Gives you:
- Cinematic depth
- Crisp image quality
- Great low-light performance
Not required — but nice if you want a premium look.
🔗 If you're still planning your full course flow, see How to Create an Online Course (Complete Guide)
Section 2 — The Most Important Piece: Your Microphone
Audio is more important than video. A simple mic upgrade can transform your course quality instantly.
1. Lapel Microphone (Best budget option)
- Clips onto clothing
- Works with phones, cameras, laptops
- Excellent clarity
2. USB Microphone Great for:
- Voiceovers
- Screen recordings
- Desk-based teaching
3. Shotgun Microphone Good for DSLR + distance recording setups.
🎧 Tip: Always record a 10-second test and listen back before recording your main lessons.
🔗 For recording workflows and setup techniques, see How to Record an Online Course
Section 3 — Lighting That Makes Everything Look Better
Lighting instantly increases perceived production value.
1. Natural Window Light Free, soft, flattering. Best when facing the window.
2. Ring Light Perfect for talking-head videos.
3. Softbox Lights Create soft, even lighting — great for course creators who want a studio vibe.
Placement Tip: Put your light source at a 45-degree angle to your face for natural shadows.
Section 4 — Backdrops & Environments
A clean background makes a huge difference.
Options:
- Plain wall
- Shelves with simple décor
- Zenler-branded background
- Blurred background (if recording with webcam apps)
Avoid:
- Distracting clutter
- Busy patterns
- Uneven lighting
Your students should focus on YOU and the content.
Section 5 — Screen Recording Tools
Screen-based courses are extremely popular and easy to create.
Recommended tools:
- Zenler Screen Recorder
- Loom
- OBS Studio (free)
- ScreenFlow (Mac)
- Camtasia (PC/Mac)
Screen recording tips:
- Zoom into the interface
- Increase cursor size
- Use simple highlighting
- Keep your desktop clean
🔗 For lesson flow and teaching structure, see How to Script Your Course
Section 6 — Recommended Budget Setups (Copy This)
💰 Budget Setup (~£50–£100)
- Smartphone
- Wired lapel microphone
- Ring light
- Zenler for editing + hosting
Perfect for most beginners.
💼 Intermediate Setup (~£150–£350)
- Smartphone or webcam
- USB microphone
- Softbox lighting
- Tripod
- Acoustic foam or curtains
🏆 Pro Setup (£500+) (Only if you really want it)
- Mirrorless camera
- Wireless lav mic
- Studio softbox lights
- Background system
Not required — your content matters more than the gear.
Section 7 — Your Pre-Recording Equipment Checklist
Before recording, check:
- Is your lighting even?
- Is your mic close to your mouth?
- Is your camera angle stable?
- Is your background clean?
- Have you prepared your lesson outline?
🔗 Once your videos are ready, upload them using How to Upload & Structure a Course in Zenler
Summary: Equipment That Actually Matters
- A smartphone or decent camera
- A lapel or USB microphone
- Good lighting
- Simple background
- Screen recording software
- Clear lesson structure
You do NOT need expensive gear — clarity beats budget every time.
❓ FAQ's
Q: What's the minimum gear I need to record a course? A smartphone, a lapel mic, and a ring light are more than enough.
Q: Should I buy a DSLR to make my course look professional? Not necessary — lighting and audio matter far more.
Q: How much should I spend on equipment? Most creators spend £50–£150 for a complete setup.
Q: What's the best microphone for beginners? A wired lapel mic offers the best quality for the lowest cost.
🚀 Call to Action
Your equipment is ready — now it's time to create lessons your students will love.
Zenler helps you upload, organise, and publish your entire course with zero tech headaches.
👉 Start building today with New Zenler
📌 Your Complete Course Creation Roadmap
How to Create an Online Course (Complete 2026 Step-by-Step Guide)
- How to Plan an Online Course
- How to Script / Outline Your Course
- How to Record an Online Course
- Course Equipment Guide
- How to Price Your Online Course
- How to Upload & Structure a Course in Zenler
🎥 Watch the Full Video Series
Prefer to learn by watching? We've turned this entire guide into a step-by-step video series on YouTube.
👉 Watch the Course Creation Playlist
FAQ
Who is Course Equipment Guide for Recording Online Lessons for?
Course Equipment Guide for Recording Online Lessons is for online course creators, coaches and educators who want a practical way to build, market and improve their digital learning business with New Zenler.
How does New Zenler support this workflow?
New Zenler combines course delivery, memberships, live sessions, communities, email marketing, funnels, pages, payments and analytics in one connected platform.
What should creators do next after reading this guide?
Creators should choose one improvement to implement, update the related page or campaign, then measure whether it improves leads, engagement, sales or student progress.
Categories: : Online Course Creation
Copyright © 2026 Zenler. All rights reserved.
Terms | Privacy Policy | Cookie Policy | Support