How to Build a Complete Course Funnel in New Zenler
 David Zenler
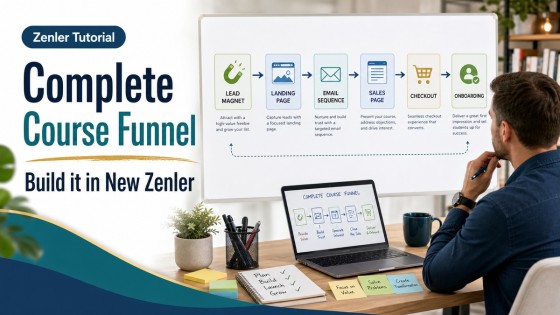
Build a complete New Zenler course funnel with lead magnet, landing page, thank-you page, email sequence, sales page, checkout and onboarding.
Quick answer: To build a complete course funnel in New Zenler, start with one clear course offer, create a lead magnet, build an opt-in landing page, add a thank-you page, connect an email nurture sequence, send people to a focused sales page, attach checkout to your course, add an order bump or upsell where useful, then test the opt-in, email, sales and onboarding flow before sending traffic.
A course funnel is not just a landing page. It is the path that turns a curious visitor into a lead, then into a student, then into someone who knows exactly what to do after purchase.
The advantage of building this in New Zenler is that the main pieces can live in one platform: course delivery, funnels, pages, email, automation, checkout, payments, coupons, community and analytics. That reduces the messy handoffs that often happen when creators connect separate tools.
This tutorial shows the full course funnel structure and how to think through each step before you build.
The Complete Course Funnel Flow
A practical course funnel usually has these stages:
- Traffic source
- Lead magnet or free training
- Opt-in landing page
- Thank-you page
- Email nurture sequence
- Course sales page
- Checkout
- Order bump or upsell
- Student onboarding
- Follow-up and improvement
New Zenler’s current sales funnel software page describes funnels that handle lead capture, email nurturing, checkout and automation. The platform also lists lead magnet, video series and survey funnel templates on the current features page.
Step 1: Choose One Course Offer
Do not start by building pages. Start by deciding what the funnel is selling.
Write down:
- The course name
- The specific audience
- The problem it solves
- The result students can expect
- The price or pricing model
- The main reason someone should buy now
If the offer is unclear, the funnel will feel unclear. A good funnel makes one next step obvious.
If you need help shaping the offer first, use the guides on planning a course launch with AI and pricing an online course.
Step 2: Create a Lead Magnet
A lead magnet gives the right person a useful first win before asking them to buy.
Good course funnel lead magnets include:
- A checklist
- A short PDF guide
- A mini-course
- A worksheet
- A live workshop
- A webinar or training session
- A quiz or survey result
- A template pack
The lead magnet should naturally connect to the course. If the course is about launching a membership, the lead magnet could be a membership launch checklist. If the course teaches video creation, the lead magnet could be a video setup worksheet.
The goal is not to attract everyone. The goal is to attract the people most likely to need your course.
Step 3: Build the Opt-In Landing Page
The opt-in page has one job: explain the lead magnet and ask for the email address.
Keep it focused:
- Headline that names the result
- Short explanation of who it helps
- Bullets showing what they get
- Image or preview of the resource
- Simple opt-in form
- Clear button text
Zenler’s landing page builder is built to create pages, capture leads, send follow-up emails and collect payments from connected funnels. Keep the first version simple, then improve it after you see real conversion data.
Step 4: Create the Thank-You Page
The thank-you page confirms the opt-in and sets expectations.
Use it to say:
- Your resource is on the way.
- Check your inbox.
- Here is what to do next.
- Here is a useful related resource.
- Here is the next step if you are ready now.
You can also add a soft bridge to the course, such as a short video or a link to a relevant sales page. Avoid making the thank-you page too busy. The visitor should know what just happened and what happens next.
Step 5: Connect the Email Sequence
Email is what turns a one-time opt-in into a real relationship.
A simple course funnel email sequence can include:
- Delivery email: send the lead magnet and confirm the next step.
- Value email: teach one useful idea related to the course problem.
- Story email: explain why this problem matters and what changed for you or your students.
- Authority email: share proof, examples, mistakes or a framework.
- Offer email: invite them to the course.
- Objection email: answer the main hesitation.
- Reminder email: give a clear reason to act now.
Zenler’s current automation page explains the idea of setting rules so actions trigger follow-up automatically. The current online course platform page also describes how emails and funnels can respond when someone downloads a lead magnet, joins a waitlist or enrolls in a course.
Step 6: Build the Course Sales Page
The sales page explains why the course is the right next step.
Include:
- Clear promise
- Who the course is for
- Problem and desired outcome
- Course modules or roadmap
- What is included
- Bonuses or support
- Testimonials or proof if available
- Pricing and payment options
- FAQ
- Checkout button
A course sales page should make the decision easier. It should not bury the offer under vague copy. Keep returning to the transformation: what changes for the learner after completing the course?
Step 7: Attach Checkout to the Course
Checkout is where the funnel becomes revenue.
Zenler’s current Sell Online page lists one-time payments, subscriptions, payment plans and free access options, with Stripe, PayPal and Razorpay support referenced across the current pricing and feature pages.
Before launch, check:
- The correct course is attached.
- The price is correct.
- Payment plan or subscription settings are correct.
- Coupons are tested if used.
- Checkout copy is clear.
- Post-purchase access works.
Do not skip test purchases or preview checks. A small checkout mistake can quietly damage a launch.
Step 8: Add an Order Bump or Upsell Only if It Helps
An order bump or upsell can increase average order value, but it must feel useful.
Good examples include:
- A template pack that helps students implement faster.
- A workshop replay related to the course outcome.
- A private session or feedback review.
- A bundle with a related course.
- A community or membership upgrade.
Do not add an upsell just because the funnel has space for it. Add it because it helps the right student get a better result.
Step 9: Build Student Onboarding
The funnel does not end at payment. A strong onboarding sequence helps students begin, which improves completion, satisfaction and future sales.
Your onboarding can include:
- Welcome email
- Login/access instructions
- How to use the course
- First lesson recommendation
- Community invitation
- Support expectations
- Progress reminders
New Zenler’s online course platform page highlights the connected nature of courses, funnels and emails. Use that connection so students know exactly what to do next.
Step 10: Test the Full Funnel
Before sending traffic, test the funnel from the visitor’s point of view.
Check:
- Opt-in form works.
- Lead magnet delivery email arrives.
- Thank-you page displays correctly.
- Email links work.
- Sales page buttons go to checkout.
- Checkout accepts payment.
- Coupons work if included.
- Order bump or upsell displays correctly.
- Student gets course access.
- Onboarding email arrives.
- Mobile view is usable.
This is also where you check page titles, meta descriptions, images, ALT text and internal links if SEO traffic is part of the plan.
How This Fits With Other Funnel Guides
If you want the wider funnel strategy, read How to Build a Sales Funnel for Creators. If you want a broader Zenler funnel tutorial covering different funnel types, use How to Build Funnels in Zenler. If you are planning a timed launch, use the Course Launch Funnel Guide.
Complete Course Funnel Checklist
- Course offer defined
- Lead magnet created
- Opt-in landing page built
- Thank-you page built
- Delivery email written
- Nurture emails written
- Sales page built
- Checkout attached to the course
- Payment model tested
- Coupons tested if used
- Order bump or upsell added if useful
- Onboarding sequence created
- Mobile view checked
- Full funnel tested before traffic
Conclusion
A complete course funnel is the bridge between content and enrolment. It attracts the right people, gives them a useful first step, follows up automatically, explains the course clearly, makes checkout simple and helps new students start well.
Build the first version simply. Test every step. Then improve the funnel based on opt-ins, clicks, sales, completion data and student feedback.
FAQ
Can I build a full course funnel in New Zenler?
Yes. New Zenler includes funnel tools, landing pages, email, automation, checkout, payments and course delivery, so creators can build a connected course funnel in one platform.
What should a course funnel include?
A complete course funnel should include a lead magnet, opt-in page, thank-you page, email sequence, sales page, checkout, optional order bump or upsell, and student onboarding.
Do I need a lead magnet before selling a course?
You can sell without a lead magnet, but a relevant lead magnet usually improves conversion because it gives the right audience a useful first win and starts the email relationship.
How do I know if my course funnel is working?
Track opt-in rate, email opens and clicks, sales page clicks, checkout conversion, refund reasons, onboarding engagement and student completion. Improve the weakest step first.
Categories: : Zenler Tutorials
Copyright © 2026 Zenler. All rights reserved.
Terms | Privacy Policy | Cookie Policy | Support