How to Stream With OBS to YouTube and Social Platforms
 David Zenler
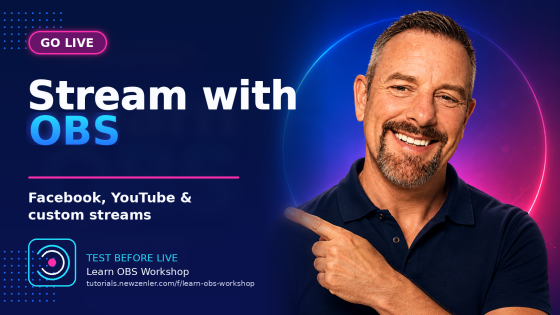
Learn how to stream with OBS, test privately, connect Facebook with a stream key and server URL, and set up YouTube broadcasts from OBS.
Streaming with OBS becomes much easier once your camera, audio and scenes are already prepared. The real secret is testing the complete stream before going live.
At this point, you've built almost everything you need.
Your camera works.
Your microphone runs through OBS.
You've created scenes.
You've added graphics and video.
You can screen share.
You've even learned how to record video directly in OBS.
Now we can take that finished OBS presentation and send it somewhere live.
This is where people sometimes make streaming more complicated than it needs to be.
The actual OBS part is quite logical.
The platform you're streaming to may change its interface, buttons or connection process over time.
OBS remains your production environment.
You prepare everything there first.
Then you connect that output to the platform.
Quick answer: How to Stream With OBS to YouTube and Social Platforms explains how to stream with OBS, test privately, connect Facebook with a stream key and server URL, and set up YouTube broadcasts from OBS.
How Does OBS Live Streaming Work?
Think about everything we've built so far.
Your OBS output might contain:
- your camera
- microphone
- splash screen
- logos
- video clips
- screen sharing
- green-screen backgrounds
- audio processing
OBS combines all of that.
Streaming simply takes the resulting output and sends it to a live destination.
Depending on the platform, that connection might happen through:
- an account connection
- a streaming service integration
- a server URL and stream key
- a custom streaming or RTMP-style connection
The exact destination can change.
Your scenes don't have to.
That's one reason setting up OBS first is so useful.
Start OBS Before You Open the Streaming Platform
One of the workshop rules is very simple:
Start OBS first.
Open OBS.
Check that the camera is there.
Check your microphone.
Check your scenes.
If you're using OBS as a virtual camera for another application, make sure the Virtual Camera is running.
If the camera doesn't appear when OBS opens, the workshop demonstrates a simple troubleshooting step: open the camera source properties, temporarily select another camera and then select the correct camera again.
That can refresh the connection.
Don't start your live destination first and then begin trying to assemble OBS around it.
Get the production ready.
Then connect the stream.
Check Your Camera Before You Stream
Sometimes OBS can open before your physical camera is ready.
In the workshop, this results in the expected camera image not immediately appearing.
The fix demonstrated is to:
- Open the camera source properties.
- Switch temporarily to another available camera.
- Switch back to the intended camera.
- Confirm the image has returned.
That's a useful little troubleshooting habit.
But the bigger point is this:
Look at your OBS preview before going live.
Don't assume that because the scene worked yesterday it must still be perfect today.
Check Your OBS Audio Too
If you're following this workshop setup, your physical microphone is already being handled inside OBS.
We covered that in How to Connect OBS Audio to Zoom With a Virtual Cable.
So check the Audio Mixer.
Is your microphone moving?
Is it muted?
Are media sources configured correctly?
If you're going through an application that uses your OBS virtual camera and virtual audio cable, remember the route we've built:
Camera → OBS → Virtual Camera
and:
Microphone → OBS → Virtual Audio Cable
If you bypass the OBS audio route and select your physical microphone somewhere else, the other OBS audio sources won't automatically follow it.
That matters when you start playing media during the live.
The Most Important Streaming Rule: Test, Test, Test
This is one of the main messages in the workshop.
Don't use the real audience as your test.
Create somewhere private.
For Facebook, the workshop uses a private testing group.
For YouTube, the demonstration creates a private broadcast.
The exact platform isn't the point.
The process is.
Before the real live session, test:
- camera
- microphone
- video clips
- media audio
- scene changes
- screen sharing
- your stream connection
Then watch the recording or playback.
Make sure the output actually arrived.
This is one of the easiest ways to remove unnecessary stress from a live workshop.
Create a Private Test Environment
If you're going to use a social platform regularly for live video, create somewhere you can test without bothering your real audience.
In the workshop, I use a dedicated private Facebook testing group.
Nobody is waiting for a polished presentation there.
That's where I can deliberately check whether the setup works.
The same principle applies wherever you stream.
You need somewhere safe enough to make mistakes.
That's much better than discovering the audio is wrong after you've already welcomed everybody to the real session.
Test Every Scene Before Starting the Stream
Before connecting the stream, click through the scenes.
Look at them.
Splash Screen.
Main Camera.
Videos.
Screen Share.
Whatever else you're planning to use.
Make sure they're ready.
Remember, a live stream is live.
If you click the wrong scene, the audience sees it.
If a graphic is badly positioned, they see that too.
If you accidentally expose something private on a shared display, you can't rewind the moment.
Preparation matters.
Streaming OBS to Facebook: The Workshop Example
The Facebook section of the workshop is useful because the planned workflow doesn't behave exactly as expected.
Originally, the idea is to use OBS as the camera source and select the virtual audio cable for the microphone.
But during the workshop, the expected webcam controls aren't appearing correctly inside Facebook's interface.
Rather than pretending everything worked perfectly, I switch to another method.
This is an important practical lesson.
Live platforms change.
Buttons move.
Interfaces behave differently.
Sometimes the workflow you used previously isn't available in the same place anymore.
That's when the streaming-software connection becomes useful.
Use the Streaming Software Option When Needed
In the workshop, Facebook provides a streaming-software option.
That gives the connection details required to send the OBS stream to Facebook.
The two important pieces demonstrated are:
Stream key
and:
Server URL
You copy those details from Facebook and enter them into OBS.
The destination is telling OBS:
"Send the stream here, and use this key so I know which broadcast it belongs to."
That's essentially what we're doing.
Where Do You Enter a Stream Key in OBS?
In the workshop, the process is:
OBS → Settings → Stream
Then choose the custom streaming option.
Enter the supplied:
Server URL
and:
Stream key
Apply the settings.
Now OBS knows where to send the broadcast.
When you start streaming from OBS, the receiving platform should begin detecting the incoming stream.
You can then complete the live process on the platform side.
What Is a Stream Key?
A stream key identifies your broadcast connection.
You don't need to understand the technical details to use it.
The practical thing to remember is that the key connects your OBS output to the intended live stream.
Treat stream keys carefully.
They're part of the connection information used to send content to your broadcast.
Use the key supplied for the stream you're setting up and paste it into the appropriate OBS streaming settings.
What Is the Server URL?
The server URL tells OBS where to send the stream.
Together, the server URL and stream key provide the connection being demonstrated in the workshop.
The platform supplies them.
OBS uses them.
Once both sides are configured correctly, the platform can receive the video being produced in OBS.
That's the basic concept behind a custom streaming connection.
Start the Stream From OBS
Once the connection information is entered, click:
Start Streaming
OBS begins sending the output.
In the workshop, the Facebook preview then begins receiving the stream.
At that point, you're not necessarily live to the final audience yet.
You still complete the live setup on the platform side.
That's useful because it gives you another opportunity to see that the signal has arrived before committing to the live broadcast.
Check the Preview Before You Go Live
Look at the preview.
Is your camera correct?
Is the splash screen correct?
Does the picture look normal?
During the workshop, the camera preview behaves strangely at one point.
Rather than going live and hoping it fixes itself, I refresh the camera source by changing the selected camera and then switching back.
The image returns to normal.
That's exactly why you check.
The preview is giving you a warning before the real audience sees the problem.
Use it.
Run Through Your Scenes During the Test Stream
Once the private stream is running, don't just stare at your Main Camera scene and say:
"Looks fine."
Switch through the things you're actually going to use.
Play your prepared video.
Check whether its sound arrives.
Return to yourself.
Try the next media scene.
Use your Screen Share.
Make sure your microphone still works when you move between them.
Your test should resemble the real presentation.
Otherwise you're only testing a tiny part of the system.
Check the Finished Facebook Test
When the test ends, go back and watch it.
In the workshop, I check the recording in the private testing group.
I can hear the audio.
The media has come through.
The video is there.
Now I know the connection actually worked at the receiving end.
That's much stronger evidence than:
"The meters were moving in OBS, so I'm sure it's probably fine."
Don't test what OBS says it's sending.
Test what your audience will receive.
Streaming OBS to YouTube
The YouTube workflow in the workshop is a little different.
OBS offers a direct account connection.
Inside:
Settings → Stream
You can select YouTube and connect the account.
The workshop completes the authorization and OBS then has access to additional YouTube-related broadcast controls.
This allows the live broadcast to be managed much more directly from within OBS.
Connect Your YouTube Account in OBS
The process demonstrated is:
- Open OBS Settings.
- Go to Stream.
- Choose YouTube.
- Connect the account.
- Complete the authorization.
Once the connection is made, OBS can work with the YouTube account used for the stream.
Again, platform interfaces can change over time.
What matters is understanding the workflow:
OBS production → account or streaming connection → broadcast destination
Manage a YouTube Broadcast From OBS
After the account connection, the workshop uses the Manage Broadcast option.
This allows a new broadcast to be prepared without having to set up every piece separately elsewhere first.
The workshop enters details such as:
- broadcast title
- description
- category
- audience setting
- visibility
- optional thumbnail
For the test, visibility is deliberately set to Private.
That's important.
We're still testing.
We don't want to create an accidental public broadcast while trying to find out whether the microphone works.
Keep Your First YouTube Test Private
This is the same test-first rule again.
When you create the broadcast, choose a private setting for the test.
Then start streaming.
OBS sends the presentation into YouTube.
You can check the result without inviting the real audience.
Once you've proved that your scenes and sound are working, you've removed a huge amount of uncertainty.
The workshop checks the resulting private stream afterwards and confirms that the output came through correctly.
That's what you're looking for.
Evidence.
OBS Can Bring YouTube Controls Into the Workspace
One useful part of the YouTube integration shown in the workshop is that OBS can display additional YouTube-related docks and broadcast controls.
For a public broadcast, chat can also be integrated into the workspace.
That means you don't necessarily need to keep jumping between as many different windows while managing the live session.
The exact setup depends on the type of broadcast you're running.
But it's another example of OBS becoming the central production environment.
Streaming Platforms Won't All Work the Same Way
This is an important point from the workshop.
Facebook and YouTube don't behave identically.
One workflow may offer a direct account connection.
Another may require you to use server and stream-key details.
A platform can also change its interface.
So don't try to memorise:
"Click the third button from the left and then the second dropdown."
That kind of tutorial can become outdated very quickly.
Instead, understand the underlying process.
You need:
OBS producing the stream
and:
a destination receiving the stream
How those two are connected depends on what the platform offers.
Don't Panic When a Platform Changes
The Facebook part of the workshop is actually a good example of this.
Something that had previously been straightforward isn't behaving as expected during the recording.
That's annoying.
But OBS still gives us another route.
Use the streaming-software connection.
Enter the server and key.
Continue.
This is a much more useful mindset than thinking:
"The button moved, therefore OBS no longer works."
The platform interface changed.
The underlying streaming concept didn't.
Test Again After Changing a Connection Method
If you planned to use one streaming method and then had to switch to another, test again.
Don't assume the fallback must work because you've entered the right-looking information.
In the workshop, the incoming stream is checked on the platform.
Then the media and audio are tested.
Then the result is watched back.
That's the correct process.
A connection isn't finished until you've proved the audience can receive it correctly.
Should You Stream Directly From OBS or Through Zoom?
It depends on the type of live you're running.
The workshop makes an important distinction.
If I'm presenting by myself, I may not need Zoom at all.
I can send the OBS presentation directly into the destination platform.
That's a nice simple setup.
But if I'm hosting a live session with guests or participants who need to be part of the broadcast, then an application such as Zoom may still be involved.
The workshop refers to using Zen Zoom in that situation.
So ask:
Am I broadcasting myself and my OBS production?
or:
Do I need other people inside the live session too?
The answer affects the workflow.
Direct OBS Streaming Is Useful for Solo Broadcasts
Suppose you're doing a quick promotional live.
No guest.
No panel.
No audience participant needs to appear on screen with you.
Your scenes are already prepared.
You can stream the OBS output directly to the platform.
That's exactly what the workshop demonstrates with the later Facebook broadcast.
It's quick.
You don't need to introduce another application just because you normally use one for workshops.
Use the simplest workflow that fits what you're actually doing.
Use Your Existing OBS Scenes for the Live
There's another advantage here.
You haven't created a special production just for Facebook.
Or another completely separate setup for YouTube.
You're using the scenes you've already built.
Splash Screen.
Main Camera.
Media.
Screen Share.
The destination is changing.
The OBS production can remain largely the same.
That's where all the work from the earlier tutorials starts paying off.
Don't Forget Your Audio When Streaming
A beautiful live picture with no sound isn't a successful broadcast.
Before you start, check the Audio Mixer.
Check your microphone.
Check your media.
If you're playing videos, test that their sound reaches the live destination too.
If you need to revisit how the audio works, see:
How to Connect OBS Audio to Zoom With a Virtual Cable
and:
How to Use OBS Audio Filters for Better Microphone Sound
Your live audience shouldn't be the first people to discover one media scene is silent.
Streaming Quality Depends on More Than OBS
The workshop focuses on getting the workflow working rather than trying to optimise every possible streaming setting.
That's a good approach for beginners.
A live stream involves your:
- computer
- camera
- OBS setup
- audio
- destination platform
- internet connection
- streaming configuration
If something starts behaving badly, don't immediately change twenty OBS settings.
Identify where the problem is.
Your preview may look good locally while the destination is showing an issue.
Or the incoming stream may be fine while one source inside OBS is wrong.
Work logically.
Create a Pre-Live OBS Routine
Once you've streamed a few times, you want this to become routine.
A simple process might be:
- Start OBS.
- Check the camera.
- Check microphone levels.
- Check media audio.
- Run through all required scenes.
- Check the Screen Share source.
- Connect to the platform.
- Confirm the incoming preview.
- Run a private test when needed.
- Only then go live to the real audience.
That is far less stressful than improvising the technical setup five minutes before the session.
The Confidence Comes From Testing, Not Hoping
After testing the Facebook and YouTube streams in the workshop, I can see and hear the results.
That means I know the camera reached the destination.
I know the microphone reached it.
I know the videos were heard.
Then going live becomes much easier.
That's what testing gives you.
Not perfection.
Confidence based on evidence.
There is a big difference.
Common OBS Streaming Problems
My camera isn't showing when I open OBS
Open the camera source properties, change temporarily to another available camera and then return to the intended device. The workshop uses this to refresh the camera connection.
The platform isn't showing my OBS camera option
Platform interfaces can differ or change. In the Facebook workshop example, the expected webcam workflow doesn't behave as intended, so the demonstration moves to the streaming-software connection.
Where do I put the Facebook stream key in OBS?
The workshop enters the platform's server URL and stream key under Settings → Stream using the custom streaming option.
OBS says it's streaming but I don't see anything on the platform
Check the destination's incoming preview and confirm that the server URL and stream key were entered correctly for that broadcast.
My live video looks strange in the preview
Don't go live yet. Check the camera source and refresh it if necessary, then run through the scene again.
People can see me but can't hear the video clips
Test your media audio route before the real stream. Make sure the Media Source audio is active and routed according to the OBS setup you've created.
Can I connect YouTube directly to OBS?
The workshop demonstrates connecting a YouTube account from OBS's Stream settings and then using OBS broadcast-management controls.
Should my first test stream be public?
No. The workshop deliberately uses private testing environments so the complete workflow can be checked without broadcasting mistakes to the real audience.
Do I need Zoom to stream from OBS?
Not necessarily. The workshop streams directly from OBS when presenting solo. An application such as Zoom becomes more relevant when other people need to participate in the live broadcast.
OBS Streaming Checklist
Before an important live stream:
- Start OBS before the destination platform
- Confirm the camera is working
- Check microphone levels
- Check your media audio
- Check your scene order
- Open the correct screen-sharing content
- Click through every scene you'll use
- Create a private test destination
- Connect OBS to the correct platform
- Enter the supplied server URL and stream key where required
- Confirm the destination is receiving the OBS stream
- Check the preview before going live
- Play media during the test
- Test your screen-sharing scene
- Watch or listen to the completed test stream
- Fix anything that's wrong
- Only then broadcast to the real audience
That's not overkill.
It's a system.
And once you've done it enough times, it becomes quick.
Learn OBS With Me in the Free Workshop
Streaming is where all the earlier OBS work comes together.
Your camera.
Audio.
Scenes.
Graphics.
Video.
Screen sharing.
You aren't creating those pieces again when you go live.
You're simply connecting the production you've already built to a destination.
That's exactly what we work through in the free Learn OBS Workshop.
Learn OBS Workshop | Present, Stream & Record Better
You can also return to the complete Learn OBS beginner's guide whenever you want to see the full 12-part series.
Related platform comparison resources
Use these related guides to compare platforms and plan your creator workflow on New Zenler:
- New Zenler vs Kajabi vs Thinkific comparison
- Migrate to New Zenler without breaking your course business
- New Zenler creator workflow examples
FAQ About Streaming With OBS
Can OBS stream directly to social platforms?
Yes. The workshop demonstrates sending OBS output to Facebook through a streaming-software connection and connecting a YouTube account directly inside OBS.
How do I connect OBS to Facebook for live streaming?
In the workshop example, Facebook supplies a server URL and stream key through its streaming-software option. Those details are entered in OBS under the custom Stream settings before starting the stream.
What is an OBS stream key?
The stream key is part of the information used to associate your OBS stream with the intended broadcast on the receiving platform. The destination platform supplies the key.
What is a custom stream server in OBS?
A custom streaming connection lets you enter the server information supplied by the destination platform, including the server URL and stream key demonstrated in the workshop.
Can I connect my YouTube account to OBS?
The workshop demonstrates selecting YouTube in OBS Stream settings, connecting the account and then managing a test broadcast from within OBS.
Can I create a private YouTube test stream?
Yes. The workshop creates a test broadcast with private visibility before relying on the setup for a real live stream.
Why should I test an OBS stream privately?
A private test lets you confirm the camera, microphone, media, scene changes and screen sharing at the actual destination. This prevents your real audience becoming your technical test group.
Can I stream video clips through OBS?
Yes. Video clips added as Media Sources or scenes can be included in the stream. Test their audio as well as the picture before going live.
Can I screen share during an OBS live stream?
Yes. Your Screen Share scene can be used just like any other OBS scene. Prepare it first and check that you're sharing the correct display or window.
Do I need Zoom when streaming with OBS?
Not for every broadcast. The workshop demonstrates direct OBS streaming for a solo presentation. Zoom or another meeting tool may be useful when guests or participants need to be involved.
What To Do Next
At this point, you've built almost the full OBS workflow.
You can:
Set up your camera.
Control your audio.
Add images.
Play video.
Use a green screen.
Screen share.
Record.
And go live.
There's one more part of the workshop, and it's particularly useful if you create social video.
Your normal OBS setup is landscape:
1920 × 1080
But social media often needs the opposite orientation:
1080 × 1920
You don't want to destroy your normal setup every time you need a vertical video.
That's where profiles and duplicated scene setups come in.
Continue with How to Use OBS Profiles for Vertical and Social Videos.
We'll build a separate mobile setup, change the canvas to vertical, reposition your sources and show how OBS can help you create social content quickly without rebuilding your main production.
And before your next live?
You know the rule.
Test, test, test.
Join the free Learn OBS Workshop and build the complete system with me.
FAQ
Who is How to Stream With OBS to YouTube and Social Platforms for?
How to Stream With OBS to YouTube and Social Platforms is for course creators, coaches and educators who want a clearer OBS setup for recording lessons, streaming sessions or creating better video content for their online business.
How does this OBS workflow connect with New Zenler?
Creators can use OBS to improve video and live-session production, then use New Zenler to host courses, deliver memberships, run live sessions, build funnels and manage learners in one platform.
What should creators check before recording or streaming with OBS?
Check the scene layout, microphone input, audio filters, camera framing, recording settings, internet connection and where the finished lesson or live replay will be delivered in New Zenler.
Categories: : Website Builder
Copyright © 2026 Zenler. All rights reserved.
Terms | Privacy Policy | Cookie Policy | Support